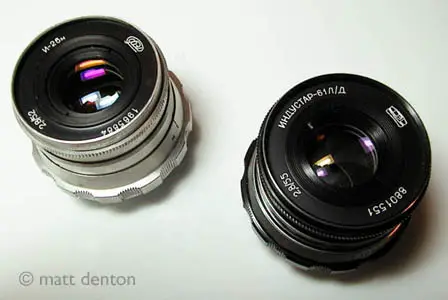
 If you own one I probably don’t even have to explain it, but for the uninitiated, the very common and very excellent ‘Russian’ (actually Ukranian) lenses Industar-26 and Industar-61 (found on the long-lived FED 2 and later FED cameras) are frequently found gummed-up with grease that has thickened to a sticky wax consistency. Not unlike toilet ring wax if you’ve ever had the pleasure. Common symptom: the focus feels alternately stiff and loose throughout the range like it’s rubbing on something…waxy. So to get the most out of your lens, you’ll need to get this gunk out and replace it with fresh grease. You’ll be surprised at the difference it makes. Luckily, it’s an easy if slighly messy task that you can do yourself! Now, follow along with me….
Getting Started
Materials needed: a well lighted area, I also recommend a tray to work in; jeweler’s screwdrivers; paper towels and rags; cotton swabs; Windex and/or some other grease-cutting solvent; some good synthetic grease. Possible other materials: slotted spanner for the retaining rings if doing the lens front as well; flat black enamel for touching up lens interior, lens brush and tissues for cleaning the glass when everything else is done. Oh, and time! Set aside at least an hour for this task.
Special Note about Set Screws
Set screws are little screws with (usually) no head and a point at the far end that digs into something to hold a piece in place against something else. Very very common in lens construction. Now, I can’t stress enough that you must use the correct size screwdriver for each set screw, not too large or small, and not to over tighten or overtorque the set screws. They are extremely small and not all that strong. Also they are extremely easy to lose. Whenever possible I don’t even remove them, I simply unscrew them just enough to get the components apart and leave the set screws in their sockets. Now you know as much as I do!
First Steps
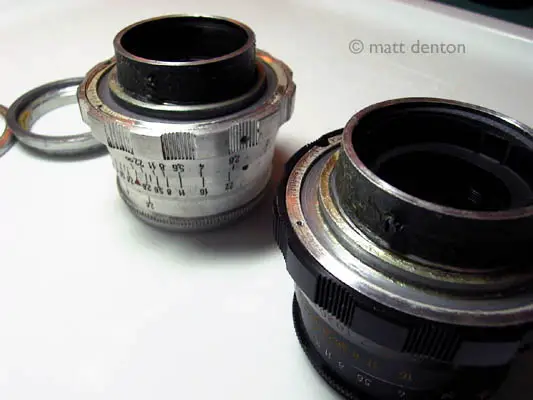
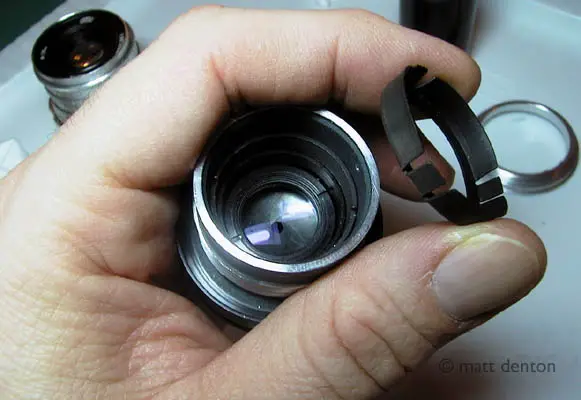
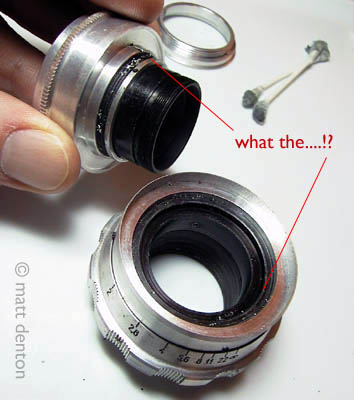
The first stage is easy enough: flip over the lens and remove the three screws holding on the rear ring. The screws are usually held in place with a spot of paint that must sometimes first be chipped away a little before you can easily remove the screws. (On the way back you’ll probably want to hit these with a little drop of clear nail polish.) Note that one side of the ring has recesses for the screw heads; this is the side facing the camera. Here you get your first sticky hint of what’s coming next.

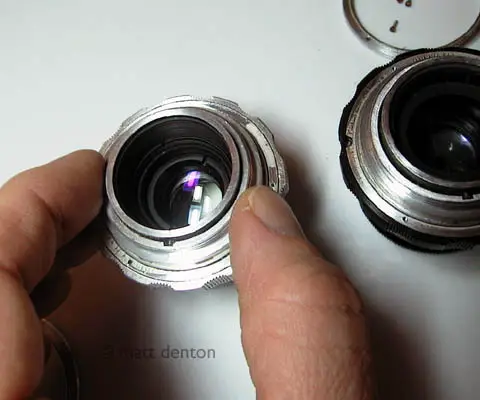
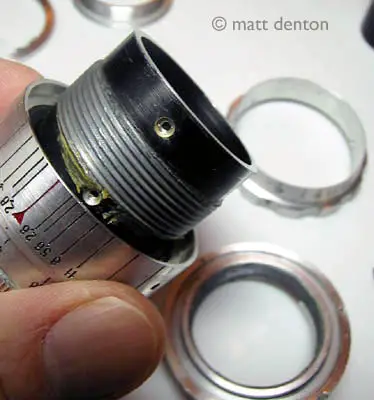
Once you lift off the rear ring, the next domed ring just lifts off. It may resist, but that’s just the congealed grease holding it in place. See pic. Ew. This ring lines up with a guide screw that will need to be removed before continuing the disassembly. At this point you’ll want to stop and clean all the visible waxy grease on the rings and set them aside. I first carefully scrape off as much I can, then use Windex and a rag or cotton swab for the rest. Then go wash your hands. When you’re done it’s probably as good a a time as any to remove the focus ring. It’s simply held in place with three set screws and then lifts off towards the front of the lens. Later when you replace it, screw the helicoid down to its most compacted position (=infinity) and tighten the set screws with the infinity mark exactly at the red line on the focus scale.
 |
 |
 |
 |
 |
 |
Okay, Now What?
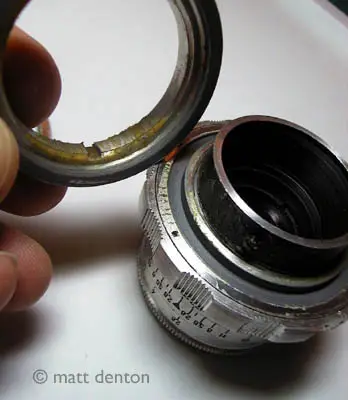
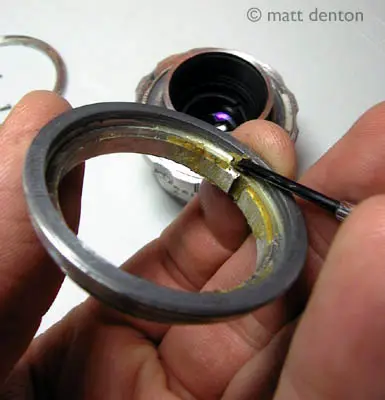
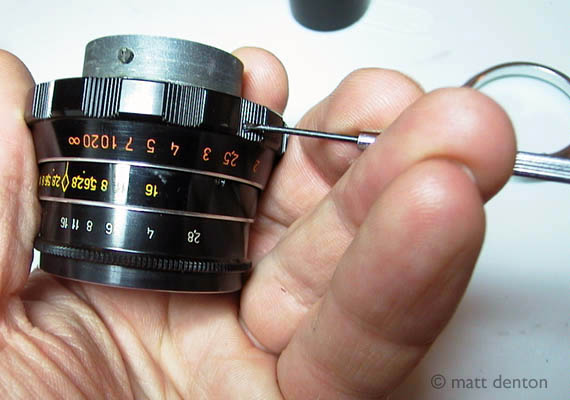
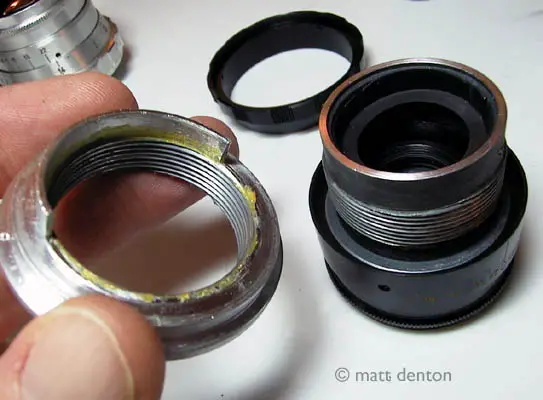
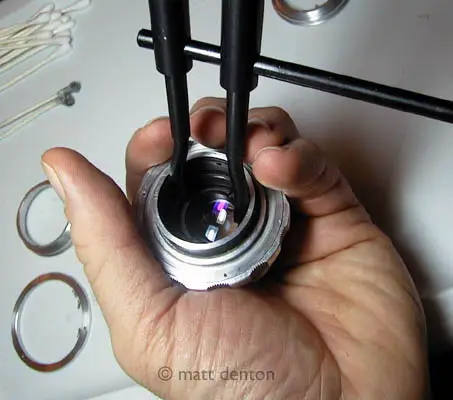
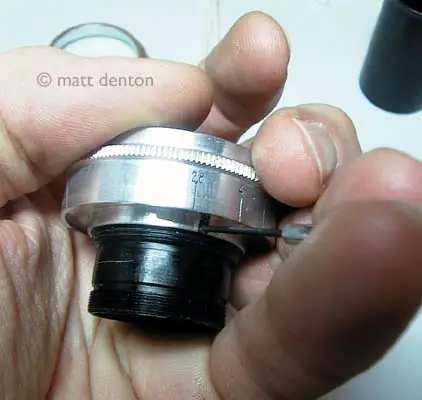
The next step is to remove the helicoid* (the big silvery part that turns). This is where your big wax problem is. The helicoid is held in place with a limiting screw that is just accessible over the distance scale shroud. I’m making up these names as I go, can you tell? Heh. If I can, I leave the distance scale in place at this point if I can so I have a fixed reference for reassembly. If you need to go farther and actually remove the distance scale shroud (you will later anyway), note that the center (red triangle) is closest to the two large limiting screws when you reassemble. *VERY IMPORTANT — before taking off the helicoid limiting screw, note where the helicoid ‘wings’ hit it at the limits. This is critical for infinity focus. The helicoid can easily be screwed in so that it fits but the lens does not focus properly. The notched areas should hit the limiting screw on both limits of the rotation, one on either side. If it bottoms out first, it’s not correct. Once the limiting screw is removed you can unscrew the helicoid and remove all visible grease from both it and the lens housing. I actually run a jeweler’s screwdriver (carefully!) through the threads to clean them out. Then clean with solvent and dry with a rag. Pack the threads conservatively with fresh grease and reassemble. I use some nice Castrol synthetic grease I got from a bike shop. I’ve also heard some tinkerers prefer to use Radio Shack Multi-purpose Lube Gel, but I find it to be too viscous. It just doesn’t give that buttery smoothness that you get from the synthetic grease. Now twist the helicoid back and forth to distribute the grease and check smoothness. If you over-lube, grease will come out the back. If you under-lube it will not be smooth enough. Don’t forget to lube the bottom of the domed ring before you put it back, it needs some grease where it rubs on the lens as it turns. Some lenses are machined better than others; if yours is rough it will shred your cotton swabs as you clean. I’ve been tempted to try and smooth some of the harsher areas with emery cloth or steel wool, but decided it would likely introduce hard-to-remove metal bits to the threads that would act like grinding compound and eventually lead to worse problems. Speaking of that, let’s move on:
 |
 |
 |
 |
 |
Wait- There’s More
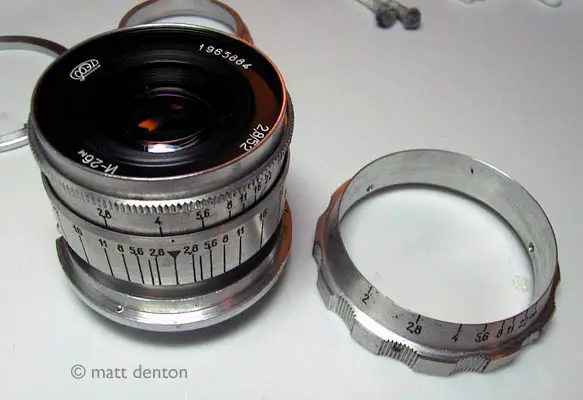
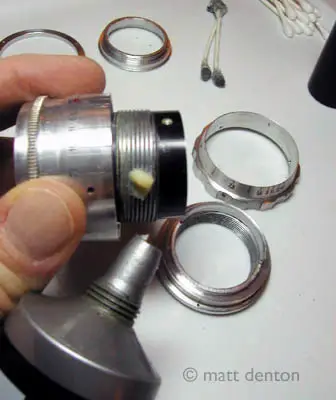
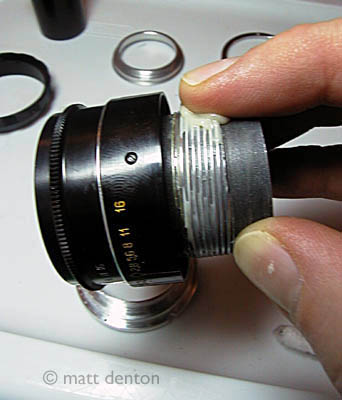
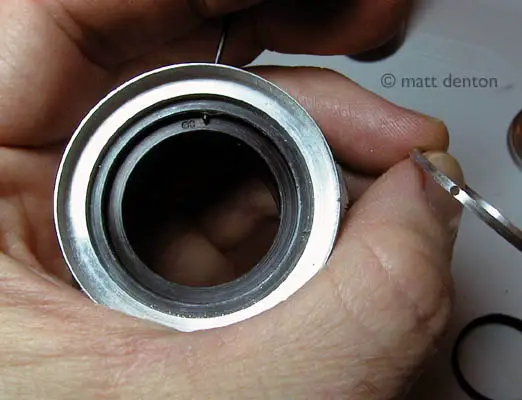
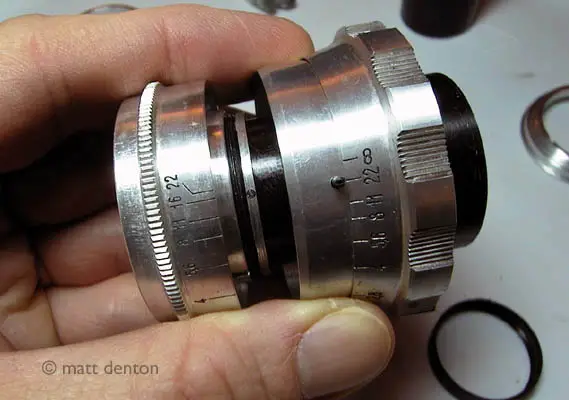
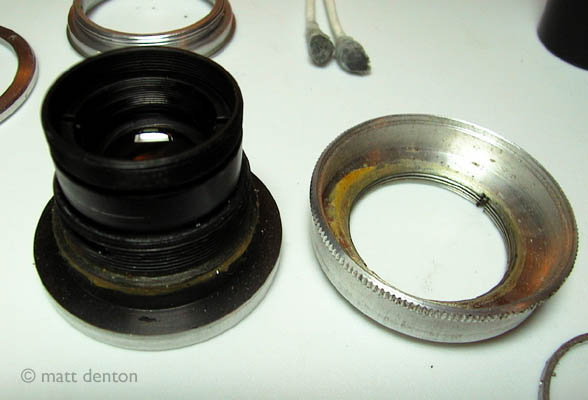
Once you have the back end set it’s time to do the front. I don’t usually do this for the I-61 since it has click-stops and they are generally right on. But the I-26 needs to be both smooth and reasonably tight through its f-stop range so I always do those. Both the I-26 and the I-61 lenses come apart in two halves by first removing the long set screw opposite the red triangle on the distance scale shroud — which actually goes into the lens housing and through a small spacer ring that sits on the lens mount — and then by removing the outermost of the inner spanner-slotted rings. This long screw gives you a fixed reference point for reassembly, which is nice. I’m not sure that the earlier ‘tabbed’ Industar-26 has this longer screw. Otherwise it’s pretty much the same. The spanner-slotted ring you need to remove is about 3/8″ tall, so keep turning, and turning…. On some of the newer lenses there might be a little pull-out shroud covering the inner spanner rings that you must remove first. It’s uncommon though, I’ve only seen a couple out of all the lenses I’ve done (now 12 or so). Once the spanner ring is out, the lens itself separates from the helicoid and its barrel.
 |
 |
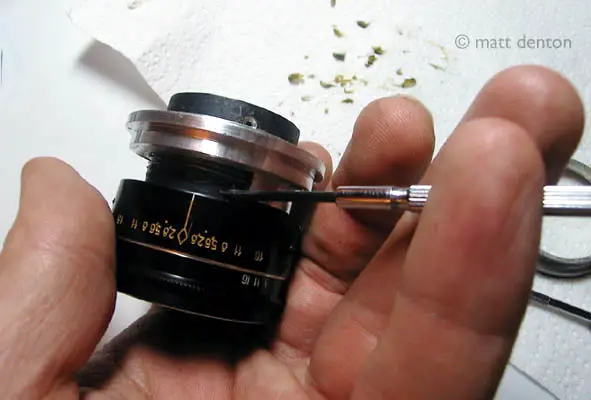
Now, when you do get the lens section out of the housing, be not afraid when you find metal bits and other debris in the lens during this stage, I’ve yet to see one that is not full of them, I have to wonder a) where they come from and b) how the lenses can perform at ALL when they all seem to be full of congealed grease and metal filings…! Clean it all up, carefully, using whatever means you have, don’t let any of those metal bits get back into the threads or anywhere else for that matter. The now-exposed aperture ring comes off by removing yet another limiting screw that goes through a notch on the aperture ring, through a cutout in the lens housing, and right into the ring that the blades are connected to. Note exactly which hole it threads into. Once you take out the limiting screw the aperture ring screws off. It goes back together pretty intuitively, though it is possible to reassemble it backwards so that the numbers are opposite the distance scale instead of aligned with it, so pay attention. Hint: limits are your reference points, such as fully-stopped (f22) and fully compacted (infinity).
 |
 |
 |
 |
 |
What’s left?
There’s usually no need to take the disassembly farther than this. Lube the threads and reassemble the aperture ring. Now, with the I-26 the aperture ring needs to be both smooth and a tad stiff so that it keeps its setting when you put it there. So be very sparing with the grease. If you want you can use a little thicker grease like moly grease, as I did on my Jupiter-8 lens. I prefer not to if I don’t have to as it can separate if it gets too warm and the resulting oil can migrate to the blades and glass. Here’s where you might want to use that Radio Shack gel!
If you really need to clean the inner glass or aperture blades up at this point, the lens elements can be removed by taking off the appropriate spanner rings. Note the placement and orientation of each. If you can simply clean up the outside without taking the elements apart, all the better. It’s actually easy to make the elements dirtier than they were in the first place by handling them and exposing the insides to dust, oil and fingerprints!
Putting it Back Together
Don’t you hate it when instruction manuals say unhelpful things like “installation is the opposite of removal”? Me too. So anyway, put your lens back together the way you took it apart, then clean up the outside with some Windex and a soft rag, then after you’ve washed your hands, check the glass again for smudges and whatnot, and get ready to check infinity focus.
Calibration
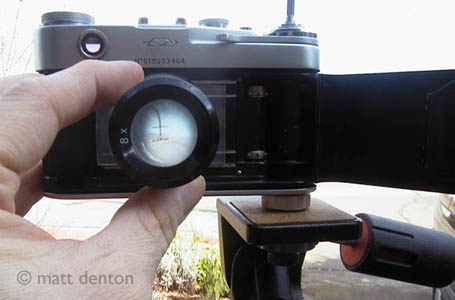
This is almost easier to show than explain. You need to check that the lens focuses to infinity at the film plane. I’ll tell you how I do it and you can go from there — basically you take a piece of glass cut just smaller than the width of film and cover one side with frosted tape. This acts as your ‘ground glass’. You can also use the focusing screen from a broken SLR if you have one. Open the back of the camera and with the shutter locked open on B with a locking cable release, check with a loupe that the distant objects are sharp when the lens is at infinity. Then check the near limit of 3′, it should also be correct (or very close) if the infinity focus is correct. Adjustment will require removing and rethreading the helicoid. (Hope you didn’t put your screwdrivers away just yet!)
(Sniff)… It’s beautiful!
Final Note
This tutorial is provided as a guide for brave tinkerers and do-it-yourselfers, and of course I assume no responsibility for any unfortunate side effects of following my instructions. My thanks to Tom Suter and Chris Denton for the loan of their gummy lenses — mine were all clean by the time I got around to making this tutorial =)
Related Links
- For more info on general repair and cleaning see my repair tips page.