click for sample
- Produced 1956-60 Zeiss Ikon AG, Stuttgart, Germany
- Film type 120
- Picture size 6cm x 6cm
- Weight 2lbs, 6oz (1kg, 77.3g)
- Lens (taking) coated Zeiss Tessar 75mm f3.5 (stops to f16)
- Filter size 35.5mm threaded, 37mm slip-on
- Focal range 3.5′ to infinity
- Shutter Synchro-Compur
- Shutter speeds B, 1/2-1/300
- Viewfinder TLR
- Exposure meter uncoupled selenium cell (*), match needle
- Self-timer
- PC sync connection, no accessory shoe
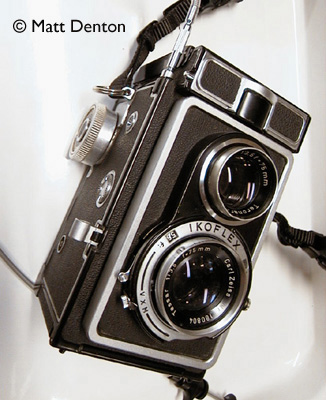
Overview
I have to admit I paid a way much for my little Ikoflex, which is in good (but not great) condition. I paid extra for the coated Tessar lens, the working and fairly accurate exposure meter and the nice case which now needs some restiching (ahem). It does take very nice pictures. Three element Teronar viewing lens. Large bright ground glass. Automatic exposure counter and locking double-exposure preventer. No accidental double exposures with this baby. (Lubitel *ahem* Lubitel).
The Ikoflex was Zeiss Ikon’s largely failed attempt to compete with the still-popular Rolleiflex. Even used Rolleicords (the lower end) are more popular with users and collectors even though the Ikoflexes (except the III, I hear) are nice cameras. True though, there is *something* about those little Franke & Heidecke TLRs that just makes you want them…that factor is lacking on these except for the beautiful model Favorit. I like the Ikoflex quite a bit – my only complaints would be the left-side focus knob (I catch myself trying to focus with the wind knob), and the tricky film loading sequence which requires some practice to get right. And the weight — it’s not the lightest camera I’ve ever lugged around…
Repairs
I went back to this one after having acquired some experience with repair and immediately noticed that there was fungus on the taking lens. Being bolder now, I began taking it apart. The front lens elements unscrew as one piece, then you flip it over and unscrew the back with a small spanner. The fungus was inside between the elements (of course). Cold cream and Windex, that’s all there is to it. Frankly, cleaning the lens elements was much easier than getting them apart. I noticed that the viewing lens had a fingerprint on the inside (hmmm….) so I unscrewed that to clean it and blew the dust off the now-visible mirror while I had it apart. I panicked when I saw that there is a free-screwing (eg both directions at will) collar on the viewing lens and thought it was for marking the depth when screwing it in but it’s not, the lens screws in independently and the collar tightens down afterwards. Whew. When I realized the viewfinder assembly is only held on by three small screws I removed it, cleaned up both sides of the viewscreen and the mirror with vodka, dusted the interior and retightened the loose mirror clamps. Cleaned the leather with Lexol (note: the back door is not leather but metal with the same texture as the leather), and the oxidized metal with Flitz. I also went over all the leather with black shoe polish on a Q-tip and touched up the black paint with a Testors Enamel Paint Marker (gloss black. Now it looks good enough to take out in public!
METER FOLLOWUP I had a report from an online acquaintance who said he fixed his nonworking light meter by removing the viewfinder assembly (3 screws), and replacing what turned out to be a dead 386 battery located behind the Zeiss Ikon nameplate! Now, there is no battery in mine and my meter works, so I think there may have been some model year variation, with older models having selenium photocells and later models having CdS meters. Now, I don’t actually use my meter, IMO it takes longer to use the calculator on the side than to calculate sunny-f16 in my head or whip out any one of my several handheld meters, but it’s nice to know that this is a possible fix for a dead meter (thanks Jim!).
Tips & Tricks
The loading of film in conjunction with resetting the automatic exposure counter is rather tricky. Consult the manual if you can find it, read it through a few times, then practice with a scrap roll. Do it twice. I’m not kidding, it’s very unintuitive and I’ve wasted a roll or two thinking I knew how to do it without reading the manual. Once you get it, you get it, but it’s different. Shoot with the VXM setting on X. Always. V is self-timer, not so much working in my case, M is for bulbs. X is for instant and includes flash sync.
I’m happy to say that this camera has strap lugs, as I find the leather case too heavy even though it was a selling point for me. Besides, my case has just a hand-strap! Use a short good quality cable release, it’s easier (and avoids camera shake). If you’re using the exposure meter, note that the calculator on the focus knob only goes up to ASA 320, the fastest film at the time. This is the speed of Kodak Tri-X PROFESSIONAL, FYI. Not regular Tri-X. Funny how things change…the manual gives the example of using ASA 17 film at 1/300 in daylight. ASA 17?? Surely they meant DIN 17. That would be ASA 25. It does mention a good tip for handholding, though: use the self-timer (V setting) so you can steady the camera with both hands. I never would have thought of that, and it works!
Related Links