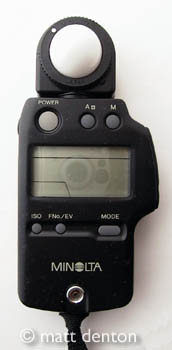
- Produced Minolta
- Meter type incident + flash (cord + non cord)
- Readout LCD
- Cell type Silicon photocell on 270° rotating receptor head
- ISO range 3 to 8000 in 1/3-stop increments
- f-stop range 1 – 90
- Shutter speed range 1/8000 – 30m (ambient), 1/500 – 1s (flash)
- EV 7.8 – 31.5
- Cine 8 to 128 fps
- Weight 4 3/8 oz.
- Battery 1 AA alkalkine
- over/under adjustment
- average/brightness difference between 2 memory readings
- sync terminal
- data adjustment (-0.8 to +0.7 EV)
- auto-off (10m)
- optional spot attachment (5° or 10°)
Overview
Future planning! Yes, that’s what I told myself and my lovely and very understanding (or at least forgiving) wife when I bought this. Well, I had to think of a good reason to justify buying a $279 light meter to go with my meterless $30 plastic Lubitel toy camera, back before I knew much about cameras, meters, the used market and ebay (we’re talking 1997 here!). I bought it largely because it’s the one I used in a portrait lighting class I took from Ron Van Dongen at the Photography Center in San Francisco. He talked it up quite a bit and it certainly seemed (because it is) very versatile and reliable. That’s also where I fell in love with the Bogen tripod and head that would soon be mine as well… granted, it did look more appropriate holding up his lovely Sinar view camera than topped with my plastic Lubitel 166. But that’s another story.
Basic Usage
Power it on and set the film speed by holding the ISO button and then pressing the up or down arrow as appropriate. For ambient reading, set the mode to AMBI and hold the meter near the subject, pointing back at the camera, and press the round button on the side to take your reading. Your best bet is to take a highlight and shadow reading and determine your exposure based on that, either mentally or by averaging in the meter. For flash reading, attach a sync cord from the flash to the meter, set mode to SYNC and take your readings as in ambient mode but pop the flash in the highlight and shadow areas with the same measuring button as before. Or you can go to mode NON. C. and do it that way, but you’ll need to trigger the flash manually or have someone do it for you while you hold the meter in the right spot and press the round measuring button to have the meter wait for the pop of the flash. It will wait for 1 minute before resetting itself. Some flashes have a high voltage trigger that would require you do this anyway as the Auto Meter wouldn’t be able to fire it.
You can read in either EV or f-stop mode, you change this with the display selector button next to the ISO button. When you’re taking your reading, adjust the shutter speed to get to your sync speed by pressing the up/down arrow buttons on the side. Pay attention to both scales, the number and the ‘analog’ scale. if it says f5.6 with a little 9 next to it, consider it to be f8. You’ll see that this is consistent with the indicator on the analog scale.
Make sure that when taking flash pictures you have your camera and your meter set to no faster than the flash sync speed! You’d think that would go without saying. Also, note that the meter covers such a wide range that you could be at 15 seconds and think it means 1/15 if you’re not reading it closely enough to see the little S above the number. I won’t name any names but I happen know a serious amateur photographer who’s made some pretty dumb mistakes under the pressure of portrait sessions…
But I have to say, nothing makes me feel like a photographer like having this baby dangling from my neck. Suddenly there are imaginary assitants bumbling about saying ‘clear the way, photographer coming through’. Ooh, he must be good, look at that light meter!
Special Notes
There are available spot attachments to turn this into a 5° or 10° reflective spot meter. I’ve never used one.
Related Links
- Manual and specs at Butkus.org