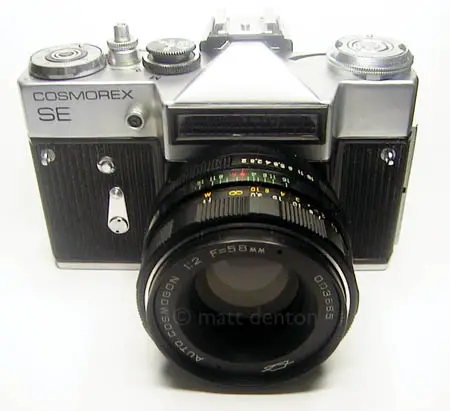
- Produced 1974 KMZ, Krasnogorsk, Russia for Photoptic Import Corp. NY
- Film type 135 (35mm)
- Picture size 24 x 36mm
- Weight 24.5oz (694.6g) body only, with Cosmogon 2.0 lens 34.8oz (986.6g)
- Lens M42 screw-mount “Cosmogon” (Helios-44M) 58mm 1:2-16 (KMZ copy of Zeiss Biotar)
- Filter size 52mm threaded, 55mm slip-on
- Shutter cloth focal plane
- Shutter speeds B, 1/30, 1/60, 1/125, 1/250, 1/500 (sync at 1/30)
- Viewfinder SLR
- Exposure meter Selenium with match needle
- GOST/ASA settings 25/50/100/200/400/500
- Battery none
- PC Sync and removable accessory shoe
Overview
Ah the mighty Zenit. Like a boomerang it returns to me*! How I came by this armored car of a camera was quite a fluke. Someone in San Francisco was moving and offered it up for free via Craigslist, and my friend Bill saw the ad and emailed the person on my behalf. He apparently saw my website and, wanting the camera to go to a good home, emailed me the next day. So from work I rode my skateboard to the other side of the Park to pick it up near my old neighborhood. There I met the nice fellow, Chris, who immediately reminded me of a friend of mine named Chris, and who was on the eve of a life-changing move to Portland, where, incidentally, my brother Chris lives. And if you think I know too many people named Chris it’s only because I didn’t mention the other ten!
The older all-metal Zenits like this one are well-built, no-frills SLRs that will probably still be around after the Apocalypse for the cockroaches to record the dawning of their civilization as it rises from our glowing ashes. They’ll have to make their own film though, or look in refrigerators like mine…
Not much to say beyond the solid build quality but that it’s a fairly basic screw-mount SLR that will accept any Pentax/Praktica (aka Universal or M42) screw-mount lens, from Asanuma to Zenit. Cold shoe, but with PC sync (at 1/30). Match needle meter, turn the meter knob to align the needle and circle, then read the exposure settings across the dial. Pin and hole shutter like on the FEDs and Zorkis, you have to lift and turn the knob to change speeds. BUT unlike those classics, here you don’t need to cock the shutter first before changing speeds (according to the manual).
*referring to having sold the 12cd
Repairs
Winding was terribly stiff, presumably from disuse but possibly from that old KMZ-issue waxy grease stiffening up the gears. With the help of Tom Tiger’s Zenit disassembly instructions I was able to get the top off. While holding the camera upside-down over the garage sink I flushed the winding gears with lighter fluid, sopped up the residue with a paper towel, then lubed liberally with synthetic bearing grease. Tips for taking apart the top: the spanner disc on the wind lever and the nut beneath the lever are reverse thread that can be unscrewed when the shutter is cocked. Watch for the tape spring to unravel when you get it out, I wound it back then held it in place with a jeweler’s screwdriver stuck in a screwhole while I pieced the top back together. Initially I had it wound on backwards, keeping the wind lever from returning… The other tip is that if you don’t need to disassemble the meter, you don’t need to remove the four black screws beneath the film speed setting disc, just the two silver ones. The meter will then stay self-contained in the cap when you remove it. Putting it back was even trickier than winding the tape spring, so I recommend leaving it in the top cap if you don’t need to service it…
Tips & Tricks
Fairly useless M/X switch under the speed setting dial, set it to X unless for some unknown reason you’re still using flashbulbs. Rewinding is done by first turning the rewind release collar around the shutter release counter-clockwise (don’t forget to return it to its original position before trying to take more pictures). Then pop out the rewind knob from the center of the meter dial by pressing the knurled center and twisting, and pull the lever up to rewind.
The nice single-coated Cosmogon (Helios) lens is a 58mm not 50mm so it’s actually noticeably narrower when viewing vs what you expect to see out a 50mm lens. I believe it’s 6 elements in 4 groups.
Related Links
- informative Zenit page at the Screw-Mount Cameras page
- The manual for the very thing at the mighty mighty Butkus.org
- The mighty Zenit is 60+ and still going strong! Not so much with the kameras any more though.
- And as it turns out, this was fellow collector-photographer Mike Elek’s first camera! Who knew?
