click for sample
- Produced 1957-73 Yashica Co., Ltd. Japan
- Film type 120
- Picture size 6cm x 6cm
- Weight 2lbs, 3.8oz (1kg 14.9g)
- Lens coated 3-element Yashikor 80mm f3.5
- Filter size Bay I (Bayonet type I)
- Focal range 3.5′ to infinity
- Shutter Copal MXV
- Shutter speeds B, 1-500
- Viewfinder TLR
- Exposure meter none
- MX Sync plus accessory shoe
- Automatic frame counter
Overview
Well-regarded and long-lived twin lens reflex by Yashica in the classic Rolleicord style. Improves upon the previous A, B, and C models; further, the later D models have the better 4-element Tessar-style Yashinon instead of the Yashikor. Earlier Yashica TLRs had either Luxamar or Tri-Lausar lenses. (“Tri-Lausar” somehow always makes me think of ‘lousy’… from what I’ve heard that’s not far off.) I believe Luxamar was the original name of the Yashinon.
The D was actually a budget model aimed at entry-level medium format users or advanced amateurs wanting to get into a Rolleicord-style TLR at 1/3 of the price, er, kind of like they are now! The later Yashicamat models, particularly the last model, the overhyped and overpriced 124G*, were (are) aimed at a more professional market. Call me crazy but to me a Yashinon is a Yashinon. They’re all good. And the Yashikor is no slouch.
* they are pretty sweet though!
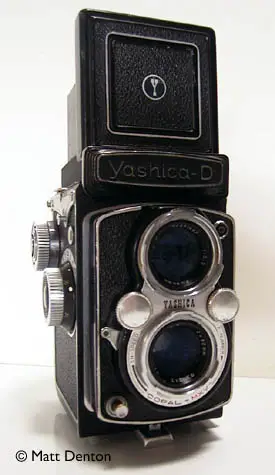
This model is actually the Yashica D 66, I presume it came out in 1966? Strange western-style ‘egyptian’ font in what was Yashica’s brand material at the time, like in a spaghetti western ‘wanted’ poster. The big Y on top of the camera is like that as well, you can see what i mean in the picture above.
Nice features: the wheels between the lenses are for setting the aperture and shutter speed, both of which read in a little window on top of the viewing lens, so you can see the settings while looking down on the the camera. Very cool. Also, matching taking and viewing lenses, always nice.
The ground glass is dimmer than on some TLRs I’ve used but at least it has a grid to help with parallax. And the hood opens and closes as one piece, something you overlook until you don’t have it! You do have the usual pop-up close focus lens and sports finder.
Repairs
Light cleaning. Shutter release button sometimes stays in, feels like a weak spring…
Tips & Tricks
Film loading is as follows: turn the large wheel on the camera bottom counter-clockwise to unlock the pin-and-hole film door lock. Move the empty spool to the top takeup position, put the film in the bottom, draw out the leader and insert into the takeup spool. Then wind until the large arrow on the film lines up with the red triangles on the camera, close the back and lock the bottom, then turn the wind knob until the S becomes the number 1. Advance locks on the next frame automatically after firing and winding on.
Other notes – the shutter release is externally threaded, so a cable release requires what is commonly referred to as a ‘Leica nipple’. Insert joke…
Related Links
- Mike has the manual for the B, a similar model, on his page of camera manuals