click for sample
- Produced 1965 Canon Camera Co., Japan
- Film type 135 (35mm)
- Picture size 24mm x 36mm
- Weight 24.2oz (686.1g)
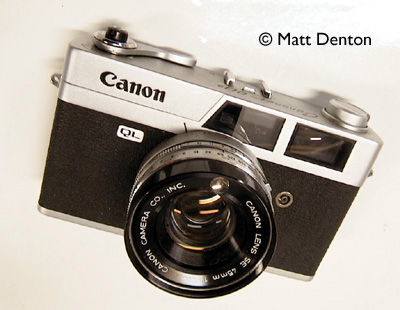
- Lens Canon SE 45mm 1:1.9
- Focal range .8m to infinity
- Filter size 55mm
- Shutter Copal SV
- Shutter speeds B, 1-1/500 automatic or manual
- Viewfinder coupled rangefinder
- Exposure meter lens mounted CdS with viewfinder needle (aperture)
- Auto EV range 2.5-19 at ISO 100
- ASA range 25-800
- Battery 1.3v mercury (RM1 1st model, 625PX second model)
- Canon Quick Load (QL) film loading system
- Accessory shoe, PC sync
- Fast-action wind lever
Overview
Handsome. Stylish. Solid. This camera has just about anything you could want in a vintage rangefinder, except that it’s not the GIII QL17. Methinks a 1:1.9 is pretty nice, though of course 1:1.7 is slightly better; also instead of 6 elements in 5 groups, this lens — the same one as on the original Canonet — has 5 elements in 4 groups. Still pretty sharp although perhaps not as contrasty as some. Besides the lens, the specs are much the same as the QL17, noting that this is the first generation (early 1965) before the Seiko shutter version (late 1965) and the smaller ‘New QL19’ (1971). Not to mention the later GIII model (1972). Yeesh. This must be where Apple gets its infamous hardware naming scheme. (Ouch.)
It’s significantly larger than the ‘new’ QL series like the GIII QL17 and has a bit more heft to it. In fact it’s as wide as the K1000, though it doesn’t have the SLR feel that the slightly smaller and lighter Yashica Electro does – the difference I think being the prominence of the lens (the 1.7 Yashinon is pretty big glass). The other difference is that like the later Auto S2 and Hi-Matic 7s this camera works in manual or automatic mode, meaning that you can use it without a battery if you don’t need the meter, as long as the shutter blades aren’t stuck!
I have two of these now, both of them in fabulous cosmetic condition, with nice leather cases and the usual issues: gummy light seals, and a very slight amount of corrosion in the battery compartment. However both have sthe dreaded Canonet stuck shutter blade problem and are in the process of being fixed, slowly, slowly.
Repairs
On one, the inside of the battery cap has a hole in it. I don’t know if that means something is missing (a spring?) but a 640KA battery (replaces PX640) is too short even though it looks like the one in the little diagram. I got a spring at the hardware store to make up the difference, and the meter needle jumps but no shutter movement even on auto (no EE). I was convinced at the time that this Copal was battery-driven (it’s not) and that I was faced with an electrical problem (it wasn’t), so I took the thing apart. PS I saw somewhere that the actual battery on this one was a RM-1R or RM1.
Taking off the top cap was easy enough. That I figured it out without instructions is testament to how much I’ve learned so far: three little screws around the perimiter, then the rewind knob unscrews the usual way (stick a screwdriver or similar bar into the slots of the film catch, then firmly turn the rewind knob counterclockwise). The wind lever is held on by a smooth retaining ring that unscrews counterclockwise, just needed a firm grip. Once the top cap was off I could see clearly what had been rattling around, a mirror from the rangefinder mechanism to which the glue had given up. A little Windex and some very carefully applied contact cement fixed that. Cleaned up the rest of the rangefinder mirrors and glass with Windex and Q-tips and now that rangefinder is super-bright and clear. Still no shutter movement, so on to the bottom cap.
A couple screws and a retaining ring to get the cap off, then three screws to remove the battery chamber. The good news is that there was enough slack in the wire to see the problem – unlike on my Electro – but it had the same corroded wire leading from the battery chamber, damage from a battery left too long. I’m going to suspect that problem now every time I get a camera that doesn’t respond to a new battery. This wire will need replacing. Extending the wire with a new piece didn’t help, and now I see that the aperture blades don’t move when I move the setting ring. There is clearly more wrong than I first thought.
After all that it turns out that the problem was really the dreaded Canonet sticky blade issue, the shutter blades all stick together eventually and so do the aperture blades, I don’t know if it’s from old lubricant or the glue holding the last element in place, but it’s super-common with Canonets. The shutter seems to work on an indirect release mechanism that is highly sensitive to any friction on the blades. A repeated application of Rosonol lighter fluid or 97% alcohol combined with working the shutter and aperture fixes it eventually. (I worked the blades wet on and off over a couple of weeks when I was watching TV, that kind of thing.) Getting to the blades is another story — I was forced to come in through the front of the lens and work the blades on the ‘B’ setting, something I don’t like to do, especially since dismantling the lens means risking damaging the glass elements.
The good news is that replacing the light seals on this camera was perhaps the most straightforward so far; the grooves were fairly shallow like on an SLR (like I said, it feels like an SLR body), and the seals on the door itself are already made of black felt. So it was merely a couple of strips of mouse pad and many Q-tips and toothpicks and of course my trusty dental picks (scraping is what they’re best at!). Easy stuff.
Tips & Tricks
Here’s a good one – the film rewind knob does lift up all the way, but only to allow you to put the film cassette in comfortably. To open the back of the camera you instead pull out a little tab on the bottom left (from the back), not the film rewind knob.
Focusing on this camera is done with a lever attached to the focus ring on the left hand side, very quick and efficient. If it’s set to auto you don’t need to move your hands out of position at all. Note also the early CdS meter placement – not TTL but certainly Through The Filter, like the other rangefinders in this class. Obviously this is practical only with a fixed lens.
The Quick-Load (QL) system is true to its name, just pull the film leader across, and as you close the back a flap springs down to hold it in place and you can just start winding on. Very nice. I’d rave about it more but I get the same results with my P30t film loading without the goofy flap. But it’s always nice to know immediately that your film is threading properly.
Related Links
- Nice example of the 19 on Mike Eckman’s page