click for sample
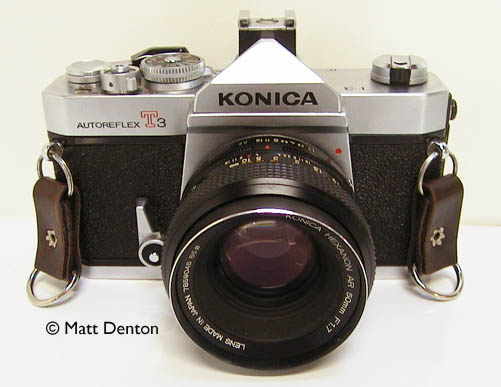
- Produced 1973-? Konishiroku Co., Japan
- Film type 135 (35mm)
- Picture size 24mm x 36mm
- Weight 26oz (737g) body only; 35oz (992g) with 1.7 50mm lens
- Lens Konica bayonet mount Hexanon AR 1.7/50mm (6 elements in 5 groups)
- Filter size 55mm
- Focal range 18″ to infinity
- Shutter Hi-Synchro Copal Square S (metal focal plane)
- Shutter speeds B, 1-1/1000 (with reminder in VF)
- Viewfinder SLR
- Exposure meter Center-weighted battery-operated TTL dual CdS metering with match needle
- EV Range 1.5 – 18 @ ASA 100
- ASA range 12-3200
- Battery two 675 (for meter and EE function)
- PC X and M sync, optional accessory shoe (shown)
- Self-timer
- Multiple-exposure lever
Overview
OK, OK, I get it now. The Konica Autoreflex T3 is as big, beautiful and solid as its impressive predecessors, the T and T2, but quieter and smoother. The wind lever is redesigned to be more comfortable, the wind stroke itself is smoother and quieter, as are both the shutter release and the shutter itself. The shutter release also has a noticeably shorter stroke than on the T and is easier to press. Throw in the hotshoe (lacking in the T and T2) and you have yourself a winner! No wonder they’re comparatively expensive, though still a bargain considering the amazing build quality and of course the legendary lenses. How can you not love a Hexanon prime? (Say… isn’t that the name of one of those transforming robots?)
After the T3 came the T3n, and like the T2 it’s not marked as such, you have to tell by the self-timer lever which is black instead of brushed steel, and the prism top which is flat instead of peaked. I don’t know what changes were made in the T3n besides some internal electrical redesign.
Repairs
No visible corrosion in the chamber but a new battery does nothing. Meter problems (due to old batteries ) are a commmon problem in the T and T3 from what I understand, possibly more common in the T3 for some reason. And if this sounds familiar, there’s something you need to know about the T3: everything about this camera reflects a thoughtful redesign except for one major flaw — the battery compartment can only be removed from inside the camera. Know what you know and think about what that means for a moment. Then come along on my magical mystery tour of the guts of the camera with which I now share a passionate love/hate relationship…
Wish I’d taken better notes now but there literally isn’t a camera I’ve taken apart more times than this one, I think I can wing it from memory. (You however would probably benefit from a reprint of the repair manual, I believe I got mine from photobooksonline.com). Remove the battery cover and the bottom plate. Set aside. Top cap removal is fairly typical for an SLR and luckily the ASA/speed dial is fairly foolproof to reinstall (once you get it off!), as it has both a pin and a tab for alignment. But do yourself a favor and set it to 1/125 & 100 first, not just so you’ll remember, but because it’s the setting for the battery check. Also it’s a good idea to remove the hot shoe before removing the top cap; it has a pin that reaches inside to touch a brass contact, and this pin can get bent when you replace the cap if you don’t take the shoe off first. Then your hot shoe doesn’t work so well. VERY IMPORTANT – once the cap is off and before you take the prism out, lock the speed indicator tape’s indexing sprocket in place with a T16 screw into a hole designed for this purpose, just visible under the red-green tabbed arm you’ll need to remove anyway. If you don’t you may find that getting it to line up right again is the most difficult thing about the whole repair! The wired PCB crown (2 screws) needs to come off the pentaprism before you remove that (4 screws). Check that the meter needle moves freely. Don’t break any of the wires! I’ve had mine apart so many times I’ve had to resolder at least three of the wires from having bent them one too many times. Now, one of the black wires on the meter side runs down to the battery chamber, it’s the one I had to replace. Note that I did actually remove the meter itself and lube the pivot just to see if that helped. It didn’t and I don’t recommend trying that. The wraparound spring is a bear to get back on.

To get to the battery chamber itself, as I mentioned, you will, believe it or not, now need to remove the mirror box. First take off the self-timer arm (via a slotted screw collar under a round widget), peel back the leather, remove the 4 front mirror box screws and one under the bottom that holds the mirror box to the body. Carefully separate the mirror box from the body… Once apart you can get at the pesky culprit. Note – I was able to work on it without completely removing the two sections of the camera, just separating the two enough to get access to the battery chamber. On reassembly there’s a lever on a spring up by the shutter release that you need to manually move aside to get the mirror box back in. I didn’t take a picture of it and don’t remember what it was but you’ll know it when you see it. Now, the other really dumb thing about the battery compartment is that the bottom tab is fused to the plastic in such a way that once apart, you can’t easily reconnect it. And since that’s the part that gets corroded, it does tend to separate easily. What I did: soldered the new wire to the tab, and epoxied a round wafer of plastic on top of it to hold it to the bottom of the battery compartment. The wire runs in a kind of straight line groove on the meter side of the mirror box. If you’re still reading then you’ve surmised correctly that this repair is not for the faint of heart, as the inexperienced are likely to destroy what was once a lovely and quite usable camera by attempting this job…
…and don’t blame me if that’s what happens!
Finishing up: Pliobond, as I’ve mentioned elsewhere, is great for regluing leather and leatherlike materials back in place. I dip a toothpick in the tube and then just rub the toothpick under the leather. This makes it easier to get the adhesive where I want it without getting too much on. Another quick note – I destroyed the little black widget on the self-timer getting it off, but made a new one out of closed cell foam (Foamies) that stays in place without glue even, I just made it a little bigger than it needed to be.
Tips & Tricks
Speaking of the self-timer, you cock it by pusing it away from the lens. BUT – if you push it towards the lens it acts as an aperture preview lever! Also if you didn’t know, you can’t cock it till you push the little safety button first. I thought mine was jammed till I figured this out. PS it’s a pretty weak spring, and could hang up your shutter if you use it.
The meter – if it’s working, that is – turns on when you cock the shutter. Turn it off manually with the on-off switch, which is a collar around the shutter release. It’s another dual-use switch: it’s also the battery check switch as well. Remove the lens, set to 1/125 and 100ASA, turn the lever to the red C and if your batteries are good the needle should be in the little red zone between 8 and 11.
A red/green dot near the shutter release tells you if the shutter is cocked and ready to go. Hot shoe as well as two PC ports for X and M sync (relocated to the shoulder from the front). And like its predecessors, the back door release is a lever on the bottom left of the camera (from the back) like some of the other late 60s SLR and rangefinder cameras, so don’t bust off your rewind crank trying to lift it up to get the door open. (It’s been known to happen.)
EE automatic aperture priority metering using the AR lenses, very nice. Has on-off switch for the meter to save batteries. Because of the voltage difference between the current alkaline 675 batteries and the original 1.3v mercury batteries this camera took, it’s good to set your ASA to lean towards 1/2-1 stop overexposure. For 100 speed film set it to ASA 80 or some such thing. Or use 1.4v hearing aid batteries. ALSO: the viewfinder readout is different than most SLRs of this vintage; the needle reads not correct but ACTUAL exposure on a scale that shows the f-stop appropriate to your shutter and film speed. It takes a little getting used to if you’ve been using regular match needle hi-lo metering. Also the scale goes from wide open at the top to stopped down at the bottom (opposite of what you’re probably used to seeing), and automatically (and mechanically) adjusts its range to the aperture range of your vintage EE lens. Very cool.
Related Links
- The brilliant Konica SLR User’s Pages in their new home
- Nice German fellow Andreas has scanned manuals on his cool Konica site